
The Briggs Stratton Valve Guide Repair Kit is a specialized solution designed to address worn or damaged valve guides in small engines‚ ensuring optimal performance and longevity.
1.1 What is a Valve Guide?
A valve guide is a critical engine component that serves as a pathway for the valve stem‚ ensuring proper alignment and movement. Typically made of durable materials like bronze or steel‚ it is press-fit into the engine’s cylinder head. The valve guide plays a vital role in maintaining engine performance by preventing oil leakage and ensuring efficient combustion. Over time‚ wear and tear can cause guides to become damaged‚ leading to reduced engine efficiency and potentially costly repairs if left unaddressed.
1.2 What is a Repair Kit?
A repair kit for the Briggs Stratton valve guide is a comprehensive set of components designed to address and fix damaged or worn-out valve guides in small engines. Typically‚ the kit includes replacement valve guides‚ specialized tools for installation‚ and necessary hardware like seals or gaskets. Its primary purpose is to restore proper engine functionality‚ prevent oil leakage‚ and ensure efficient combustion. Using genuine parts from the kit guarantees compatibility and effectiveness‚ making it essential for maintaining optimal engine performance and longevity.
Understanding the Role of Valve Guides in Small Engines
Valve guides in small engines play a critical role by directing the air-fuel mixture into the combustion chamber and exhaust gases out‚ ensuring efficient operation and preventing oil leakage.
2.1 Importance of Valve Guides in Engine Performance
Valve guides are essential for maintaining proper engine performance by ensuring the valves operate smoothly and efficiently. They prevent oil from entering the combustion chamber and allow the correct air-fuel mixture to flow. Worn guides can lead to decreased performance‚ reduced power‚ and increased oil consumption. By maintaining or replacing damaged guides with a Briggs Stratton Valve Guide Repair Kit‚ engine efficiency and overall functionality are restored‚ ensuring optimal combustion and minimizing emissions. Properly functioning valve guides are vital for the longevity and reliability of small engines.
2.2 How Valve Guides Contribute to Engine Efficiency
Valve guides play a critical role in maintaining engine efficiency by ensuring proper valve alignment and preventing excessive oil consumption. They facilitate smooth airflow and combustion by keeping the valves sealed tightly during engine operation. When guides are worn‚ oil can leak into the combustion chamber‚ reducing efficiency and increasing emissions. A functioning valve guide system‚ restored with a Briggs Stratton Valve Guide Repair Kit‚ ensures optimal engine performance‚ better fuel economy‚ and reduced wear on other components. This directly contributes to overall engine efficiency and reliability.

Symptoms of Worn or Damaged Valve Guides
Common symptoms include increased oil consumption‚ excessive smoke from the exhaust‚ reduced engine performance‚ and decreased power output due to inefficient combustion and valve misalignment.
3.1 Common Signs of Valve Guide Wear
Visible signs of valve guide wear include excessive oil consumption‚ blue smoke from the exhaust‚ and a tapping or clattering noise from the engine. As guides wear‚ they allow oil to enter the combustion chamber‚ leading to smoke and reduced performance. Misfires‚ rough idling‚ and decreased power are also indicators. Over time‚ worn guides can cause compression loss‚ further diminishing engine efficiency. These symptoms often intensify under load or at higher RPMs‚ making them noticeable during operation. Recognizing these signs early is crucial for preventing further engine damage and maintaining optimal performance.
3.2 Diagnostic Tips for Identifying Damaged Valve Guides
Diagnosing damaged valve guides involves inspecting for excessive wear and testing engine performance. A visual inspection can reveal worn or scored guides‚ while a compression test may show low compression due to guide failure. Using a borescope can provide a detailed view of the guides and surrounding areas. A leak-down test can identify air escaping through the guides. Measuring guide clearance with a dial indicator is another precise method. These diagnostic steps help confirm guide damage and determine the need for repair or replacement to restore engine function and efficiency.
Why Repairing Valve Guides is Crucial
Repairing valve guides is essential to prevent further engine damage‚ maintain optimal performance‚ and ensure proper combustion chamber sealing‚ avoiding increased oil consumption and reduced efficiency over time.
4.1 Consequences of Neglecting Valve Guide Repair
Neglecting valve guide repair can lead to increased oil consumption‚ reduced engine efficiency‚ and eventual engine failure. Worn valve guides allow oil to enter the combustion chamber‚ causing blue smoke from the exhaust. Over time‚ this can damage pistons‚ cylinders‚ and other components‚ leading to costly repairs. Additionally‚ poor engine performance‚ decreased power output‚ and higher emissions result from neglected valve guides. Prompt repair is essential to prevent these issues from escalating and ensure the engine runs smoothly and efficiently.
4.2 Benefits of Timely Valve Guide Repair
Timely valve guide repair prevents engine damage‚ reduces oil consumption‚ and restores performance. It stops oil leakage into combustion chambers‚ eliminating blue smoke and lowering emissions. Repairing valve guides enhances engine efficiency‚ boosts power output‚ and ensures smoother operation. Regular maintenance extends engine lifespan and prevents costly overhauls. Addressing issues early saves time and money‚ maintaining reliability and optimal function of your Briggs Stratton engine. It’s a proactive step towards preserving engine health and ensuring longevity‚ making it a wise investment for any small engine owner.
What’s Included in the Briggs Stratton Valve Guide Repair Kit
The Briggs Stratton Valve Guide Repair Kit includes replacement valve guides‚ installation tools‚ and detailed instructions‚ providing everything needed to restore proper engine function and performance efficiently.
5.1 Components of the Repair Kit
The Briggs Stratton Valve Guide Repair Kit includes high-quality replacement valve guides‚ precision-engineered to fit specific engine models. The kit also contains specialized installation tools‚ such as a valve guide driver or mandrel‚ to ensure proper fitting. Additionally‚ it may include O-rings or seals for valve guide lubrication and retention. A tube of high-temperature lubricant is often provided to prevent wear during engine operation. Detailed instructions are included to guide users through the installation process‚ ensuring a successful repair. These components are designed to restore valve guide functionality and maintain engine performance.
5.2 How the Kit Addresses Valve Guide Issues
The Briggs Stratton Valve Guide Repair Kit effectively addresses valve guide issues by providing durable‚ precision-engineered replacement guides that restore proper valve alignment and sealing. The kit’s components are designed to eliminate excessive oil consumption‚ reduce emissions‚ and prevent engine overheating caused by worn guides. Specialized tools in the kit ensure accurate installation‚ while the high-quality materials withstand extreme engine temperatures and wear. This comprehensive solution revitalizes engine performance‚ improves efficiency‚ and extends the lifespan of the valve train system‚ making it a reliable fix for damaged or worn valve guides.
Preparing for the Repair
Preparing for the repair involves ensuring a clean workspace‚ gathering all necessary tools‚ and aligning replacement parts for the valve guides to streamline the installation process.
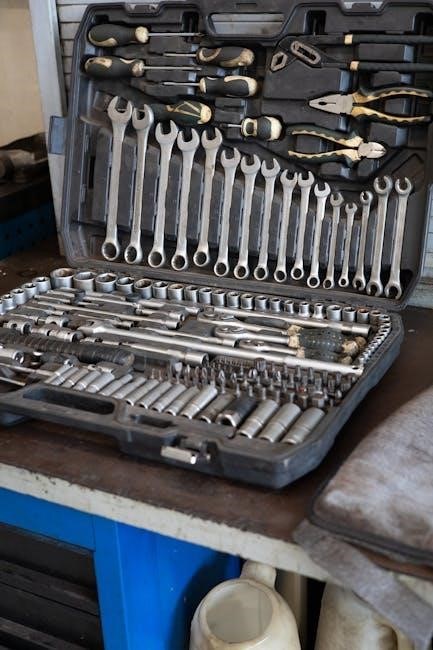
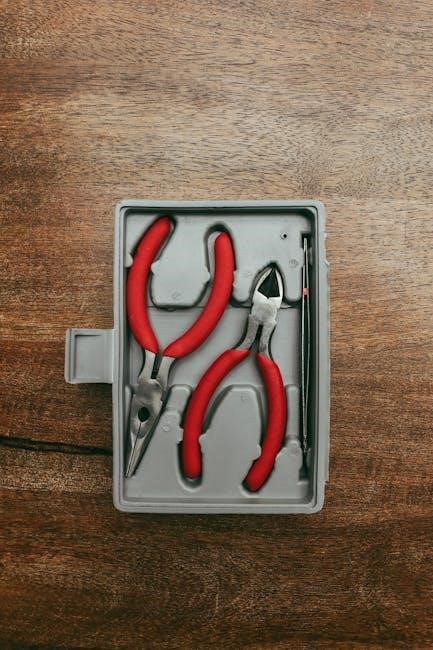
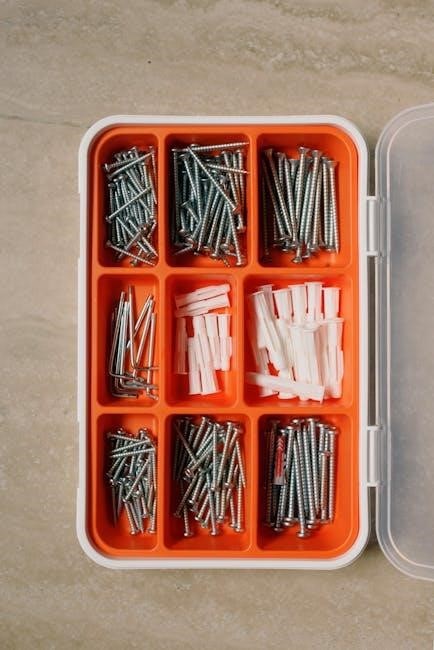
6.1 Tools and Materials Needed
To successfully repair the valve guides‚ you’ll need a socket set‚ wrenches‚ screwdrivers‚ and specialized tools like a valve guide installer. Additional materials include sealants‚ gaskets‚ and cleaning supplies. Ensure all tools are compatible with your engine type and refer to the manual for specific requirements. Safety gear‚ such as gloves and goggles‚ is essential to protect yourself during the process. Having a well-organized workspace with all components ready will help ensure a smooth and efficient repair experience.
6.2 Safety Precautions to Follow
When performing a valve guide repair‚ always wear protective gear‚ including gloves and safety goggles. Ensure the engine is cool to avoid burns. Work in a well-ventilated area‚ and avoid inhaling chemicals or fumes. Disconnect the ignition and secure the engine to prevent accidental startups. Use jack stands for added stability if lifting the equipment. Follow the manufacturer’s guidelines for tool usage and chemical handling. Stay alert and avoid distractions to maintain focus during the repair process.
Step-by-Step Installation Guide
The Briggs Stratton Valve Guide Repair Kit installation involves removing the old guides‚ installing the new ones‚ and reassembling the engine. Follow the instructions carefully for a successful repair‚ ensuring proper alignment and secure fitting of components. This guide is designed for both DIY enthusiasts and professionals‚ providing a clear roadmap to restore engine performance effectively.
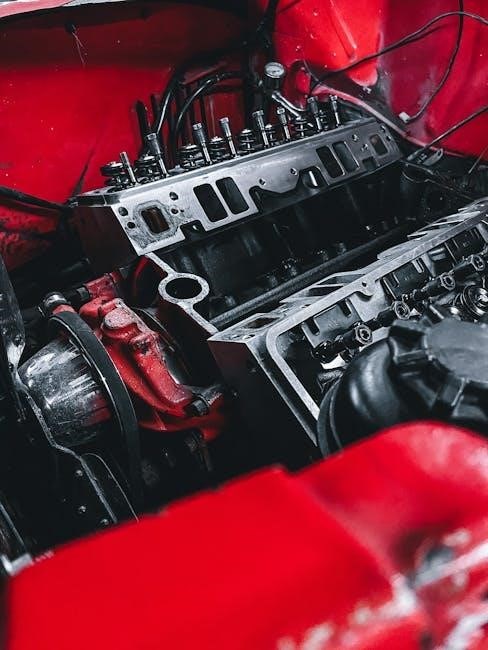
7;1 Removing the Old Valve Guides
To remove the old valve guides‚ start by draining the engine oil and disconnecting the spark plug wire for safety. Carefully disassemble the engine components to access the valve chamber. Use a valve guide puller or press to extract the worn guides‚ ensuring minimal damage to the surrounding area. Clean the cylinder head thoroughly to prepare for the new guides. Proper removal is essential for a successful installation and optimal engine performance.
7.2 Installing the New Valve Guides
Install the new valve guides using a valve guide installer to ensure proper alignment and seating. Lightly apply engine oil to the new guides and surrounding area. Gently press the guides into place‚ verifying they are flush with the cylinder head. Use a depth gauge to ensure correct installation depth. Proper alignment and seating are critical for optimal engine performance. Double-check the guides for any movement or misalignment before proceeding. This step ensures the guides function correctly and prevents future engine issues.
7.3 Reassembling the Engine Components
After installing the new valve guides‚ begin reassembling the engine components in the reverse order of disassembly. Replace the head gasket‚ ensuring it is properly seated and aligned. Reattach the cylinder head and tighten the bolts in the recommended torque sequence. Reconnect the spark plug‚ fuel line‚ and any other components removed during the process. Double-check all connections for tightness and proper alignment. Finally‚ start the engine to test for leaks or unusual noises‚ ensuring everything functions smoothly.

Post-Installation Checks and Tests
After installation‚ start the engine to check for leaks‚ unusual noises‚ or performance issues. Monitor operation to ensure proper function and system integrity‚ confirming repair success.
8.1 Testing the Engine After Repair
After completing the valve guide repair‚ start the engine and let it run for a few minutes to check for leaks or unusual noises. Monitor the engine’s temperature and ensure it operates smoothly under various loads. Perform a test run at idle and high RPM to confirm proper function. Inspect the valve area for any signs of leakage or wear. If everything runs quietly and efficiently‚ the repair was successful. Record the results for future reference and maintenance planning.
8.2 Ensuring Proper Function of the Valve Guides
To ensure the valve guides function correctly‚ inspect the area for any signs of wear or misalignment after installation. Check the engine’s compression and verify there are no leaks around the guides. Monitor engine performance‚ ensuring smooth operation and consistent power delivery. Use a compression test kit to confirm proper sealing. Regularly inspect the valve train for excessive clearance or noise. Properly functioning valve guides will improve engine efficiency‚ reduce oil consumption‚ and prevent further damage to critical components. Maintain the engine as recommended to prolong the lifespan of the repair.
Cost Considerations
The Briggs Stratton Valve Guide Repair Kit is an affordable solution‚ offering a cost-effective way to address valve guide issues without major engine disassembly or expensive overhauls.
9.1 Price of the Repair Kit
The Briggs Stratton Valve Guide Repair Kit is affordably priced‚ offering a cost-effective solution for engine maintenance. Typically ranging between $50 to $150‚ depending on the kit’s components and engine model‚ it provides excellent value compared to purchasing individual parts. This pricing makes it an accessible option for homeowners and professionals alike‚ ensuring that valve guide issues can be addressed without significant financial strain. Always check the official Briggs & Stratton website or authorized dealers for the most accurate and up-to-date pricing information.
9.2 Labor Costs for Professional Installation
Labor costs for professional installation of the Briggs Stratton Valve Guide Repair Kit vary depending on the mechanic’s rates and engine complexity. On average‚ labor costs range from $100 to $300‚ with the total investment being the sum of the repair kit and labor fees. For most small engines‚ the process takes 2 to 4 hours‚ making it a moderate expense for ensuring proper installation. It’s recommended to consult local repair shops for precise labor quotes tailored to your specific engine model and needs.

DIY vs. Professional Repair
Deciding between DIY and Professional Repair depends on your mechanical skills and time availability. DIY saves money but requires expertise‚ while professionals offer warranty and reliability at a cost.
10.1 Pros and Cons of DIY Repair
DIY repair offers cost savings and the satisfaction of hands-on problem-solving. It allows for flexibility in scheduling and avoids labor costs. However‚ it requires mechanical expertise and specialized tools. Incorrect installation can lead to further engine damage‚ voiding warranties. Time-consuming‚ especially for novice mechanics‚ and potential for errors adds stress. Success depends on following instructions precisely and having experience with small engine repairs. Weighing these factors helps determine if DIY is the right choice for your valve guide repair.
10.2 When to Seek Professional Help
If you lack experience with small engine repairs or feel unsure about the process‚ seeking professional help is advisable. Valve guide repair requires precision and specialized tools‚ and improper installation can cause further damage. If time is a constraint or you’re uncomfortable with disassembly‚ a certified mechanic is recommended. Additionally‚ professionals can ensure warranty compliance and handle complex issues that may arise during the repair. For a hassle-free and reliable solution‚ consulting a professional is often the best choice.
Maintenance Tips for Valve Guides
Regular cleaning‚ proper lubrication‚ and periodic inspections are essential for maintaining valve guides. Avoiding contaminants and adhering to manufacturer guidelines ensures optimal performance and longevity.
11.1 Best Practices for Longevity
Regular maintenance is key to extending the life of valve guides. Cleanliness is crucial; always ensure the area around the valve guides is free from debris and contaminants. Proper lubrication with the recommended engine oil helps reduce friction and wear. Avoid over-tightening components‚ as this can cause unnecessary stress. Inspect the valve guides periodically for signs of wear or damage. Operating the engine within recommended temperature ranges also prevents overheating‚ which can degrade valve guide materials. Following these practices ensures the valve guides remain functional and reliable over time.
11.2 Regular Maintenance Schedule
A well-planned maintenance schedule is essential for maintaining valve guide health. Inspect valve guides every 50-100 hours of engine operation. Clean the guides thoroughly to remove carbon buildup and debris. Lubricate moving parts regularly to reduce wear. Replace worn or damaged guides promptly to prevent further engine damage. Keep a log of maintenance activities to track the condition of your valve guides over time. Following this schedule ensures consistent performance and extends the lifespan of your engine components;
Common Mistakes to Avoid
Common mistakes include improper alignment of new guides‚ using incorrect tools‚ and insufficient lubrication. Always follow manufacturer instructions to avoid damaging engine components during repair.
12.1 Mistakes During Installation
Common mistakes during installation include improper alignment of the new valve guides‚ which can lead to uneven wear or engine damage. Using incorrect tools or applying too much force can damage the engine block or surrounding components. Additionally‚ not following torque specifications for the guide retainers can result in loose or over-tightened parts. Failing to lubricate the new guides before installation can cause premature wear. Always ensure proper alignment‚ use the correct tools‚ and follow the manufacturer’s instructions to avoid these issues.
12.2 Post-Repair Mistakes to Avoid
After installing the Briggs Stratton Valve Guide Repair Kit‚ avoid ignoring regular maintenance‚ as this can lead to premature wear of the new components. Not testing the engine thoroughly post-repair may result in undetected issues persisting. Neglecting to follow the recommended maintenance schedule can compromise the longevity of the valve guides. Additionally‚ overlooking proper engine lubrication after repair can cause excessive friction and damage. Always adhere to post-repair care instructions to ensure optimal engine performance and prevent future problems.
Troubleshooting After Repair
After installing the repair kit‚ check for leaks or unusual noises as signs of potential issues. Ensure valve guide alignment and engine oil levels are correct. Refer to the repair manual for guidance.
13.1 Common Issues Post-Repair
Post-repair issues may include valve guide misalignment‚ excessive engine noise‚ or leaks around the valve area. These problems often arise from improper installation or worn-out seals. If the valve guides are not seated correctly‚ it can lead to poor engine performance. Additionally‚ insufficient lubrication or incorrect torque settings might cause premature wear. It’s essential to double-check all components and ensure proper alignment to avoid these issues. Always refer to the manufacturer’s instructions for guidance on addressing post-repair concerns effectively.
13.2 Solutions for Persistent Problems
For persistent issues after repair‚ recheck the valve guide installation to ensure proper alignment and seating. Inspect and replace any worn-out seals or gaskets that may be causing leaks. If noise persists‚ verify that all components are securely tightened to the recommended torque specifications. In cases of recurring misalignment‚ consider consulting a professional mechanic for precise adjustment. Always refer to the manufacturer’s troubleshooting guide for specific solutions tailored to your engine model. Addressing these issues promptly ensures long-term engine reliability and performance.
The Briggs Stratton Valve Guide Repair Kit is an essential tool for restoring engine performance by addressing worn or damaged valve guides‚ ensuring enhanced durability and efficiency.
14.1 Summary of Key Points
14.2 Final Thoughts on Valve Guide Repair
Additional Resources
For further assistance‚ visit the official Briggs & Stratton website for detailed manuals and guides. Additionally‚ consider investing in specialized tools designed for small engine maintenance and repairs.
15.1 Recommended Tools and Equipment
Essential tools include a valve guide installer‚ compression tester‚ socket set‚ torque wrench‚ and needle-nose pliers. Specialized tools like a valve spring compressor and guide removal tool are also necessary. Ensure you have replacement gaskets and seals on hand. For precision‚ use a micrometer to measure valve guide clearance. Refer to the repair manual for specific tool recommendations tailored to your engine model to ensure proper installation and avoid damage. Always prioritize quality tools for durability and accuracy in the repair process.
15.2 Further Reading and Guides
For comprehensive guidance‚ refer to the official Briggs & Stratton service manuals and manufacturer-recommended repair guides. Online forums and communities‚ such as the Briggs & Stratton official website‚ offer valuable insights and tips. Additionally‚ technical bulletins and video tutorials provide step-by-step instructions and troubleshooting advice. Consider consulting small engine repair manuals for detailed procedures. For additional support‚ explore manufacturer-approved repair resources or contact their customer service for specific guidance.
0 comments on “briggs stratton valve guide repair kit”Add yours →