
Briggs Stratton valve guide repair kits provide essential components to fix worn or damaged valve guides, ensuring proper engine performance and longevity. These kits typically include new guides, bushings, and installation tools, designed to address common issues like excessive valve lash or pushrod bending. By restoring the valve train system, they help maintain optimal engine operation, reduce emissions, and prevent further damage. Ideal for both professional mechanics and DIY enthusiasts, these kits offer a cost-effective solution to valve guide-related problems, ensuring reliable engine functionality for years to come.
1.1 Overview of Valve Guide Importance in Small Engines
Valve guides are critical components in small engines, including Briggs Stratton models, as they ensure proper valve alignment and movement. They prevent excessive valve lash, reduce wear on engine parts, and maintain efficient combustion. Guides also act as heat dissipaters, transferring heat from the valve to the engine block. Over time, worn guides can lead to issues like bent pushrods, ticking noises, and reduced performance. Their role is essential for maintaining engine stability, efficiency, and longevity, making them a key focus for repairs and maintenance.
1.2 Brief History of Briggs Stratton and Their Engine Components
Briggs Stratton, founded in 1908, is a renowned manufacturer of small engines and outdoor power equipment. Known for innovation, they introduced the first lightweight, affordable engine in 1919. Their engines, widely used in lawn mowers, generators, and industrial applications, emphasize durability and performance. Briggs Stratton has consistently advanced engine technology, including valve train components like guides and bushings. Their commitment to quality and reliability has made them a trusted name in the industry, with a legacy spanning over a century of engine manufacturing excellence and customer satisfaction.
1.3 Purpose of a Valve Guide Repair Kit
A Briggs Stratton valve guide repair kit is designed to address worn or damaged valve guides, which can cause issues like ticking noises, bent pushrods, or poor engine performance. The kit provides necessary components, such as new valve guides, bushings, and installation tools, to restore proper valve alignment and engine operation. Its purpose is to prevent further damage, improve engine efficiency, and ensure longevity by repairing or replacing faulty valve guide components, thereby maintaining optimal engine functionality and reliability over time.
Identifying the Need for Valve Guide Repair

Identifying valve guide repair needs involves checking for symptoms like ticking noises, bent pushrods, or poor engine performance, which indicate worn or damaged valve guides requiring attention.
2.1 Common Symptoms of Worn Valve Guides
Common symptoms of worn valve guides include ticking noises, bent pushrods, and increased valve lash. Engines may exhibit poor performance, misfires, or reduced power output. Over time, excessive wear can lead to oil consumption and emissions issues. If left unaddressed, these problems can escalate, causing further damage to the engine. Recognizing these signs early is crucial for preventing costly repairs and ensuring the longevity of the engine. Regular inspection and maintenance are essential to identify worn valve guides before they cause significant harm.
2.2 Diagnosing Valve Guide Issues in Briggs Stratton Engines
Diagnosing valve guide issues in Briggs Stratton engines involves inspecting for excessive wear, loose bushings, or abnormal clearance; Mechanics often use specialized tools like reamers to measure guide wear. Symptoms such as ticking noises, bent pushrods, or poor engine performance can indicate faulty guides. Visual inspection of the valve train and pushrod alignment is also crucial. If the valve guide is worn beyond acceptable limits, replacement is necessary. Proper diagnosis ensures accurate repairs, preventing further engine damage and maintaining optimal performance. Briggs Stratton recommends using specific tools for precise measurements during this process.
2.3 The Role of Valve Guides in Engine Performance
Valve guides play a critical role in engine performance by stabilizing the valve train and ensuring proper pushrod alignment. They prevent excessive valve movement, which can lead to bent pushrods or damaged rocker arms. Worn guides can cause poor engine efficiency, increased emissions, and noisy operation. Replacing them with a Briggs Stratton repair kit restores proper valve lash and combustion chamber sealing, improving overall engine reliability. Properly functioning guides are essential for maintaining smooth operation and preventing costly repairs down the line.
Components of the Briggs Stratton Valve Guide Repair Kit
Briggs Stratton valve guide repair kits include new valve guides, guide bushings, reamers, and specialty tools. These components ensure precise fitment and proper engine operation, addressing wear and tear effectively.
3.1 Typical Parts Included in the Repair Kit
Briggs Stratton valve guide repair kits typically include new valve guide bushings, reamers, drill bits, and installation tools. These components ensure proper fitment and alignment. The kit may also contain specialized tools like guide installers and pullers for removing old guides. Additionally, some kits include replacement valve stems or seals to address related issues. The parts are designed to restore the valve train system to optimal condition, ensuring smooth engine operation and preventing further damage. Compatibility with specific engine models is guaranteed for precise installation and functionality.
3.2 Compatibility with Different Briggs Stratton Engine Models
Briggs Stratton valve guide repair kits are designed to fit various engine models, including aluminum and cast iron block engines. Compatibility varies, with kits tailored for specific model numbers like 220707 or 4067770-0139 E1. Some kits include parts for both intake and exhaust valve guides, ensuring versatility. However, certain models may require head assembly replacement if guides are integral. Always verify compatibility using Briggs Stratton lookup tools to ensure correct fitment and avoid installation issues. Proper matching ensures reliable performance and longevity of the engine.
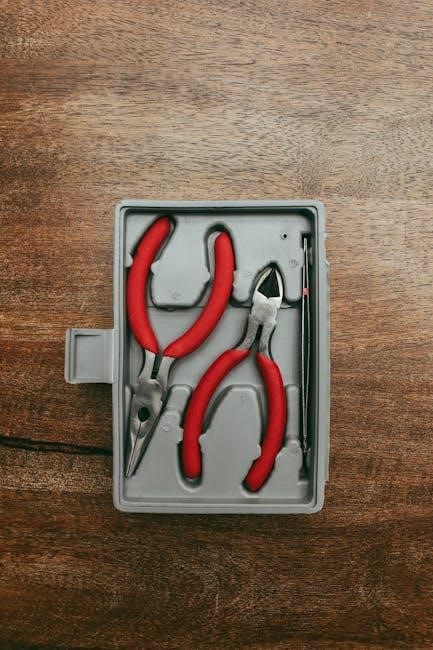
3.3 Specialty Tools Required for Installation
Installing a Briggs Stratton valve guide repair kit often requires specialized tools, such as a reamer (e.g., part number 19183) and guide bushing (part number 19192), to ensure proper fitment. A drill bit may be needed to remove old guides, while a driver or press is essential for seating the new ones. Additional tools like a valve lash adjuster and pushrod checker may also be necessary. Some mechanics recommend using plasma cutters or welders for complex repairs. Always consult the repair kit instructions or a certified Briggs Stratton service center for specific tool recommendations.

Step-by-Step Installation Guide
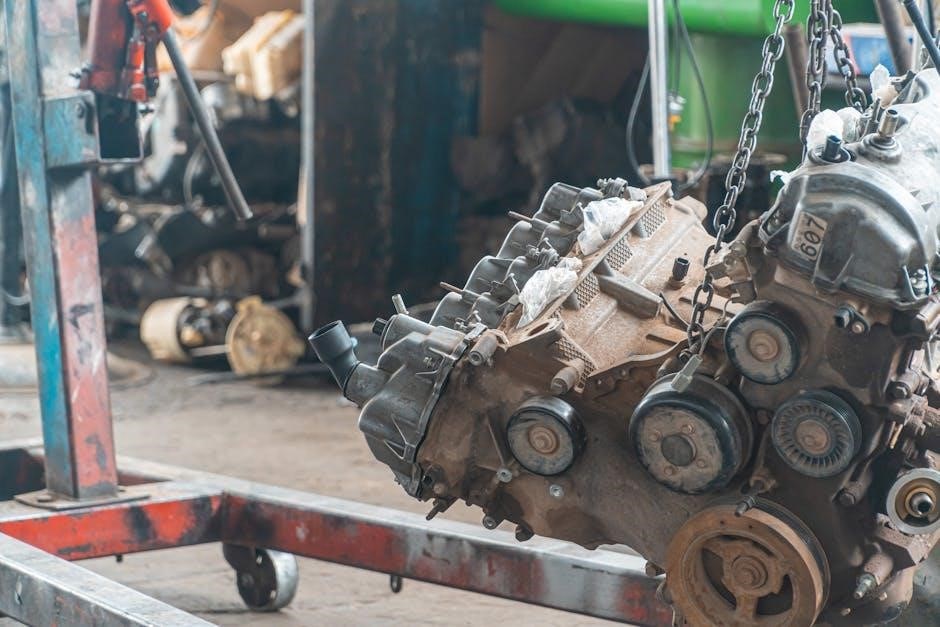
Begin by preparing the engine, removing the head, and accessing the valve guides. Use a reamer to remove the old guide, then press in the new one. Adjust the valve lash and inspect pushrods for proper alignment. Ensure all components are securely tightened and test the engine to confirm smooth operation. Follow the repair kit instructions for precise steps and torque specifications to guarantee a successful installation.
4.1 Preparing the Engine for Valve Guide Replacement
Begin by disconnecting the spark plug wire and ensuring the engine is cool. Drain the oil to prevent spills during disassembly. Remove the muffler and any other components blocking access to the cylinder head. Use a socket set to remove the head bolts and gently lift the head. Label and organize all removed parts for easy reassembly. Clean the area around the valve guides to ensure a clear workspace. Refer to the repair manual for specific torque specifications and precautions to avoid further damage during preparation.
4.2 Removing the Old Valve Guide
To remove the old valve guide, start by ensuring the engine is cool and safe to work on. Use a Briggs Stratton reamer, part number 19183, to carefully drill out the worn guide. Insert the reamer into the guide and twist it to remove the old material. Be cautious not to damage the surrounding engine block or cylinder head. After reaming, clean the area thoroughly with a brush or compressed air to remove any debris. This step is crucial for preparing a clean surface for the new guide installation, ensuring proper fitment and function.
4.3 Installing the New Valve Guide
After cleaning the area, apply a thin layer of engine oil to the new valve guide. Carefully align it with the engine block’s guide bore, ensuring proper orientation. Use a brass drift or the installation tool provided in the kit to gently tap the guide into place. Continue until it is fully seated and flush with the cylinder head. Avoid using excessive force, as this could damage the guide or surrounding material. Once installed, inspect the area to ensure no debris remains and the guide is properly aligned for optimal performance.
4.4 Adjusting and Testing the Repair
After installing the new valve guide, adjust the valve lash to the manufacturer’s specifications using a feeler gauge. Start the engine and listen for any unusual noises, such as ticking or clattering, which could indicate improper adjustment. Check for oil leaks around the valve guide area. Once running smoothly, perform a test run under load to ensure proper engine performance. If issues persist, consult the repair manual for further troubleshooting steps. Proper adjustment and testing are critical to ensure the repair’s success and prevent future problems.

Tools and Techniques for Successful Repair
Essential tools include reamers, drill bits, and specialty guide bushings. Proper techniques involve precise measurement and alignment to ensure a snug fit. Best practices minimize errors.
5.1 Essential Tools for Valve Guide Replacement
The repair requires specific tools like a valve guide reamer, drill bits, and guide bushings. A reamer ensures proper fitment, while drill bits help remove old guides. Specialty tools, such as valve spring compressors and pushrod removal tools, simplify the process. Using the correct tools prevents further engine damage and ensures precise alignment. It’s crucial to follow manufacturer guidelines for tool usage to achieve optimal results and maintain engine performance. Proper tool selection is key to a successful valve guide replacement.
5.2 Using a Reamer for Proper Fitment
A reamer is essential for achieving precise fitment during valve guide replacement. Use reamer part number 19183, as recommended by Briggs Stratton, to enlarge the valve guide hole accurately. Ream only 1/16 inch deeper than the new bushing to maintain structural integrity. Ensure the reamer is aligned straight to avoid misshapen holes. Clean the area post-reaming to remove debris. A drill press or stable hand drill is advisable for control, and safety goggles are necessary. Test the new guide’s fit post-reaming for optimal results.
5.3 Best Practices for Avoiding Common Mistakes
To ensure a successful repair, always follow proper techniques. Begin by thoroughly cleaning the engine area to prevent contamination. Use the correct tools, such as a reamer and drill bits, to avoid damaging the engine block. Double-check valve lash settings to prevent pushrod bending. Avoid over-tightening, as this can lead to stripped threads. Properly align the new valve guide during installation to ensure even seating. Reference the repair manual for specific torque specifications. Finally, test the engine at low speed after installation to identify any issues early. Proper preparation and attention to detail are key to avoiding costly mistakes.
Troubleshooting Post-Repair Issues
Address ticking noises by checking valve lash adjustments and pushrod alignment. Inspect for bent pushrods or loose valve guides. Refer to the repair manual for specifications.
6.1 Addressing Persistent Ticking Noises
Persistent ticking noises after valve guide repair may indicate improper valve lash adjustment or misaligned pushrods. Ensure the valve lash is set according to the manual using a feeler gauge. Inspect pushrods for bending or wear and replace if necessary. Verify that the new valve guides are properly seated and aligned. If issues persist, check for excessive clearance or improper reaming during installation. Consult the repair kit instructions or a certified technician for further assistance to resolve the ticking noise effectively.
6.2 Fixing Bent Pushrods After Repair
Bent pushrods after valve guide repair can disrupt engine performance. Inspect pushrods for visible bends or damage; replace them if necessary. Ensure proper alignment of the rocker arms and adjust the valve lash to specifications. If pushrods are slightly bent, careful straightening may be possible, but severe bends require replacement. Always follow the manufacturer’s guidelines for pushrod installation and adjustment to restore proper engine function and prevent further issues.
6.3 Resolving Valve Lash Adjustment Problems
Valve lash adjustment issues post-repair can cause ticking noises or poor engine performance. Check the valve train for proper alignment and clearance. Adjust the valve lash according to the manufacturer’s specifications using a feeler gauge. If the issue persists, inspect the pushrods and rocker arms for wear or misalignment. Ensure all components are securely tightened and functioning correctly. Proper adjustment is crucial for maintaining engine efficiency and preventing further damage to the valve train system.

When to Seek Professional Help
If valve guide issues persist despite DIY efforts or require specialized tools, consult a certified Briggs Stratton service center. Professionals handle complex repairs efficiently, ensuring optimal results.
7.1 Determining If the Repair Is Beyond DIY Capabilities
Determining if a valve guide repair exceeds DIY capabilities involves assessing personal expertise and tools. If specialized equipment like reamers or bushings are needed, or if symptoms persist after attempts, professional help is advisable. Complex issues like bent pushrods or valve lash problems may require advanced skills. Evaluating the severity of damage and comparing it to your experience level helps decide whether to proceed alone or seek expert assistance for reliable outcomes.
7.2 Finding a Certified Briggs Stratton Service Center
To find a certified Briggs Stratton service center, visit their official website and use the dealer locator tool. Enter your location to find nearby authorized service providers. These centers employ trained technicians familiar with Briggs Stratton engines and have access to genuine parts. They ensure repairs meet manufacturer standards, providing reliable and durable solutions. Contacting customer support directly can also guide you to the nearest certified center. Using a certified service ensures quality workmanship and genuine components, maintaining your engine’s performance and warranty compliance.
7.3 Costs Associated with Professional Valve Guide Repair
Professional valve guide repair costs vary depending on the engine model, extent of damage, and labor rates. Replacing the head assembly, which includes valve guides, can range from $300 to $1,000 or more. Additional costs may include specialized tools, bushings, and pushrod replacements. Labor fees typically range between $75 to $150 per hour, with the repair taking several hours. It’s essential to obtain detailed quotes from certified centers to understand the total expense. Factors like engine size and complexity can significantly influence the final cost of the repair.

Maintenance Tips to Prevent Future Valve Guide Wear
Regular engine maintenance, including oil changes and level checks, helps prevent valve guide wear; Avoid overloading the engine and ensure proper, consistent valve lash adjustments for optimal performance.
8.1 Regular Engine Maintenance Practices
Regular engine maintenance is crucial to prevent valve guide wear. This includes consistent oil changes, cleaning engine components, and inspecting valve trains. Ensure proper torque specifications and follow manufacturer guidelines for valve lash adjustments. Regularly check for worn parts and replace them promptly. Using the correct tools, such as reamers and bushings, helps maintain precision. Monitoring engine performance and addressing issues early prevents major repairs. By adhering to a maintenance schedule, you extend engine life and maintain optimal functionality, reducing the need for future valve guide repairs.
8.2 Monitoring Engine Oil Quality and Level
Monitoring engine oil quality and level is vital for preventing valve guide wear. Regular oil changes with the correct viscosity ensure proper lubrication, reducing friction on moving parts. Check the oil level frequently to avoid operation with insufficient lubrication, which can damage valve guides. Old or degraded oil loses its protective properties, increasing wear. Addressing oil-related issues promptly helps prevent pushrod bending and valve train problems, ensuring smooth engine operation and extending component lifespan. Regular oil maintenance is a simple yet effective preventive measure for engine longevity.
8.3 Avoiding Overloading the Engine
Avoiding overloading the engine is crucial to prevent excessive wear on valve guides and other components. Overloading increases mechanical stress, leading to premature wear and potential damage. Always adhere to the engine’s power and workload specifications to minimize strain. Regular monitoring of engine performance and workload ensures optimal operation. Excessive load can cause pushrod bending and valve guide wear, requiring costly repairs. Maintain recommended power levels to preserve engine health and extend the lifespan of critical components like valve guides and pushrods.
Briggs Stratton valve guide repair kits are essential for maintaining engine health and performance. They provide necessary components to address worn or damaged guides, ensuring proper functionality and preventing further issues. Regular maintenance with these kits helps extend engine lifespan and avoid costly repairs, benefiting both professionals and DIY enthusiasts.
9.1 Summary of Key Points
Briggs Stratton valve guide repair kits are crucial for maintaining engine performance by addressing worn guides, preventing issues like pushrod bending and ticking noises. These kits include replacement bushings, guides, and tools, ensuring precise installation. Regular maintenance with these components extends engine lifespan, reduces emissions, and avoids costly overhauls. Proper installation techniques, such as reaming and fitting, are essential for optimal results. DIY enthusiasts and professionals alike benefit from these kits, which restore valve train functionality and ensure reliable engine operation over time, adhering to manufacturer specifications and best practices for successful repairs and longevity.
9.2 Final Thoughts on Successful Valve Guide Repair
Successful valve guide repair requires precision, the right tools, and adherence to best practices. Quality repair kits from Briggs Stratton ensure durability and performance, while proper installation techniques prevent future issues. Regular maintenance and monitoring are key to extending engine life. Whether you’re a DIYer or professional, completing the repair correctly restores engine efficiency and reliability. By following guidelines and using genuine parts, you can avoid costly overhauls and enjoy consistent performance. Proper care now ensures a smoother, longer-lasting engine operation for years to come.
0 comments on “briggs stratton valve guide repair kit”Add yours →